
Billet oil pump woes, The PRESSURE is on…
This is one of those posts that keeps getting mentioned, asked about and has people worrying about the “how-to” ever since these pumps were released.
What is this pump? Well, for those that do not know or dive deeply into their engines, this is an oil pump – but it is not your average oil pump! This is a Gerotor oil pump. It relies NOT on the helical gearing of old or oil film for rotation but better gearing, ball bearings for stability and less wear and higher pressures under harsher conditions…
Generally speaking, a good 80% will never need or require this pump but even then, it is a great investment to have and it is a safeguard to your engine’s oil supply, which is the blood of your engine! No blood, then no engine! OEM have always been the highest standards for many years and while every effort has been made to make those work better, they still have flaws and drawbacks… When you step into the OEM based aftermarket section, that is when the quality drops and as many cast units are not machined correctly, gearing tolerances are not ideal and many have had spun bearings from poor quality aftermarket cast type oil pumps! Not what you want on a costly engine build.
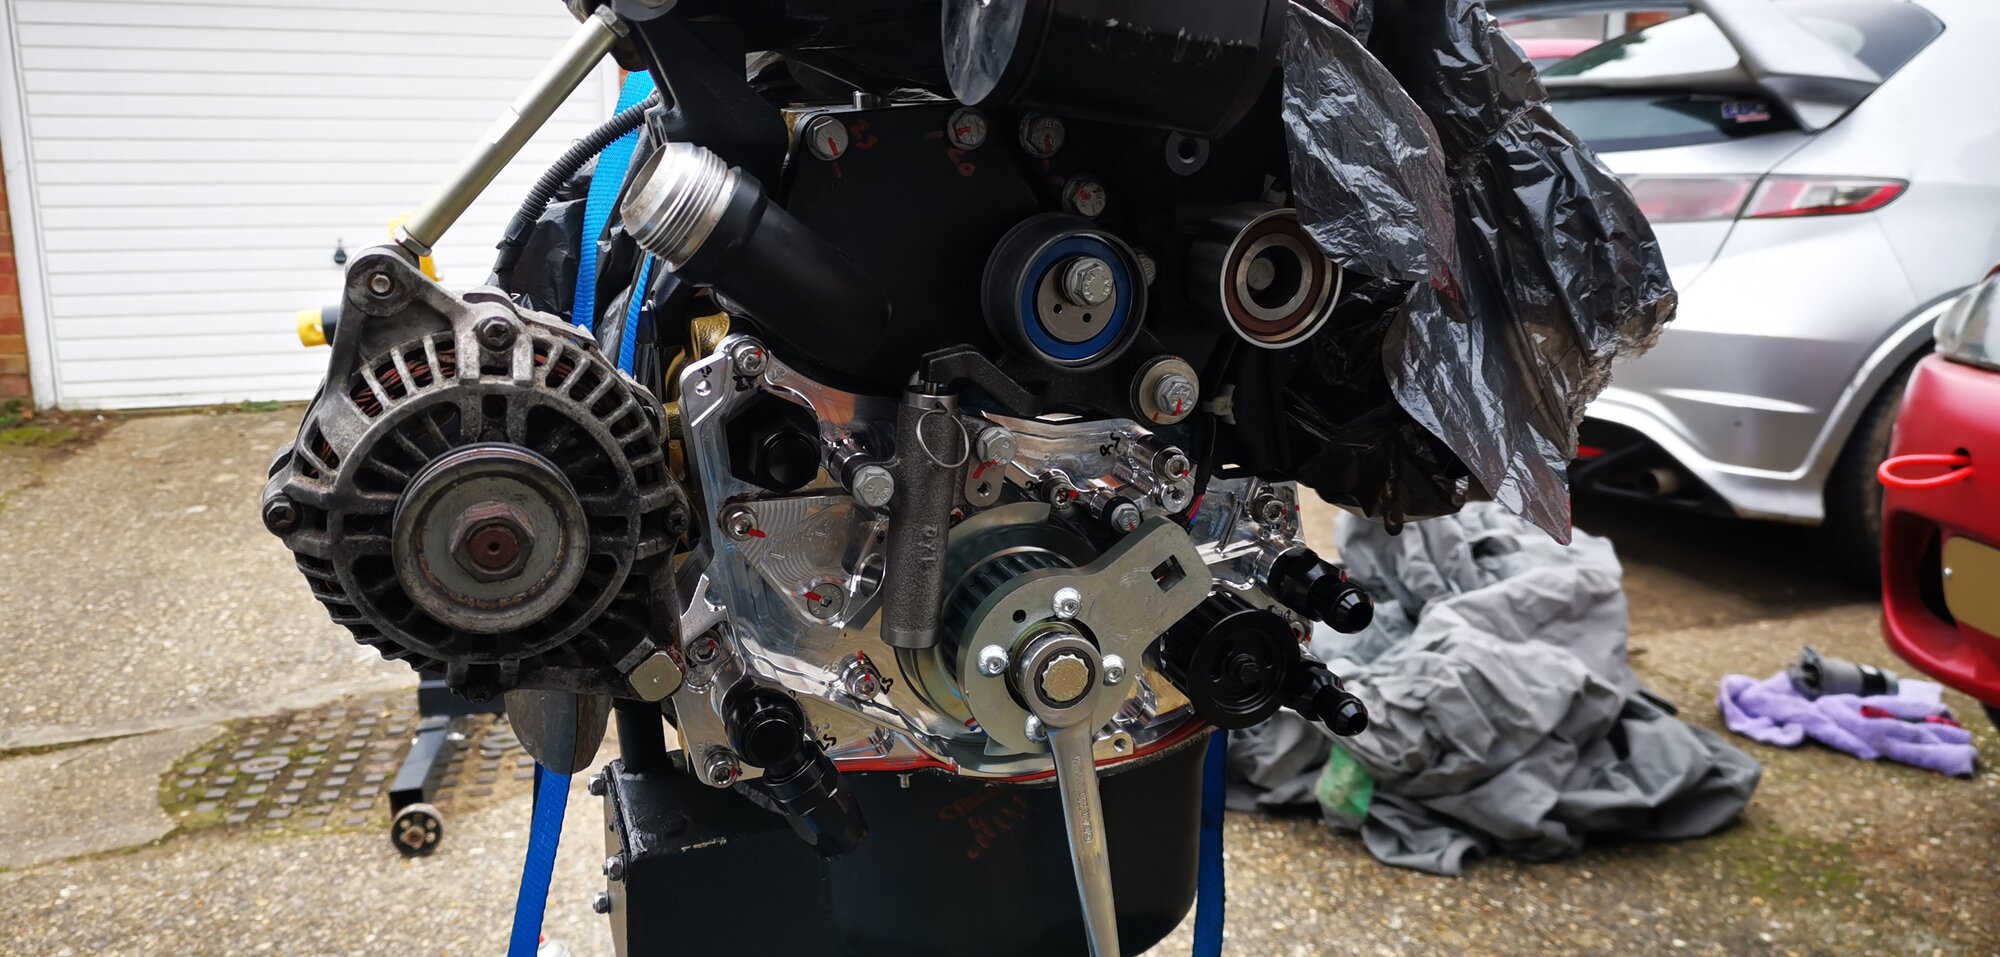
Thankfully, the BILLET oil pumps from Frontline are made to a very high standard. However, with that system come some fitting woes and boy, you really have to get inspired and crack those brain cells to make everything work. The system now uses all external ports and an external OFH (oil filter housing), so as you can already imagine, this is something to seriously consider when looking into one of these setups.
While the pump itself has clearly been well thought out, the rest of the system has not; it’s ultimately up to you, the owner, to figure out the remaining details along the way.
This blog post will hopefully help eliminate a lot of the guesswork and confusion, and show you what you need to do (and work around) to get everything installed, belts on and with a fully functional timing cover!
- Please note that this blog is based on about 95% of installs and everyone’s build will have various different parts installed and removed! This is on my personal engine/chassis and should still work for almost everyone but the more belts you run and pulleys etc. the more complex it may become and the tighter your spaces are.
With those notes mentioned, here is my specific setup.
- EWP (electronic water pump with water pump block off plate)
- PS delete (power steering) Manual rack with EPAS system (electronic steering assist)
- A/C delete (you all know that one)
- Alt is in the same spot and only using 1 belt
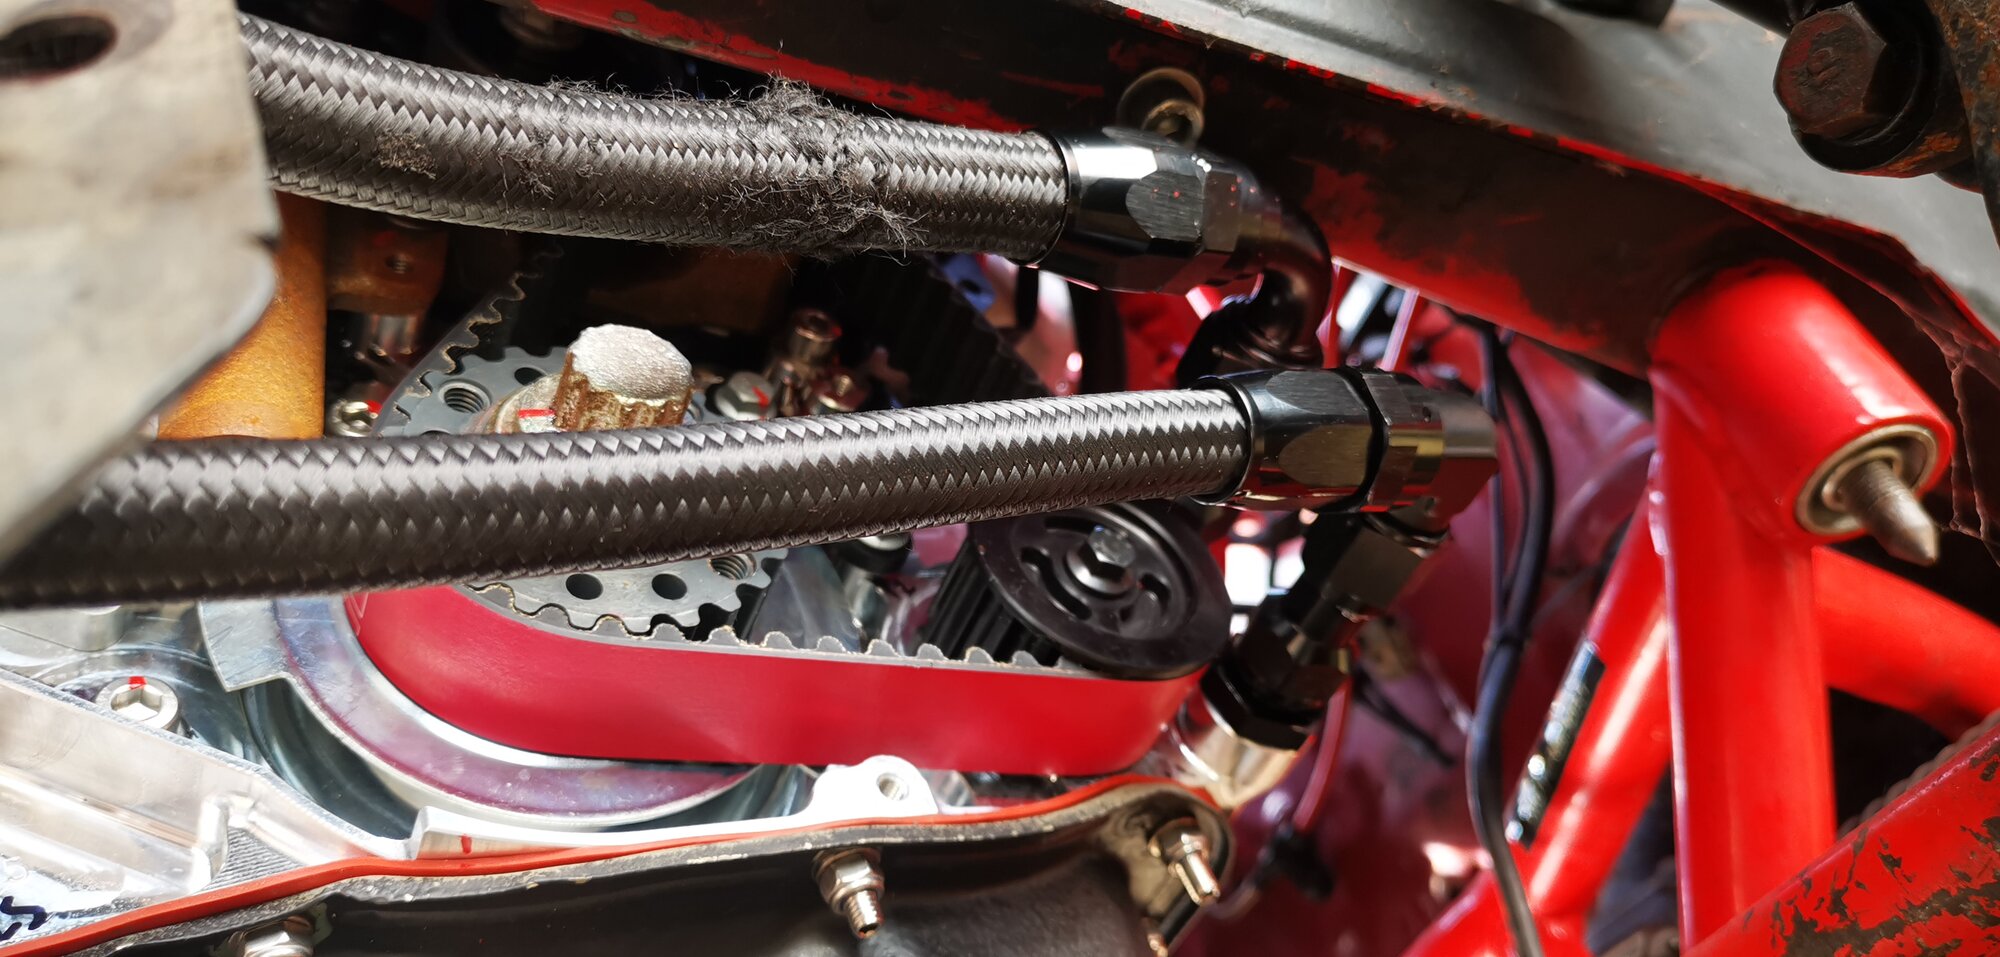
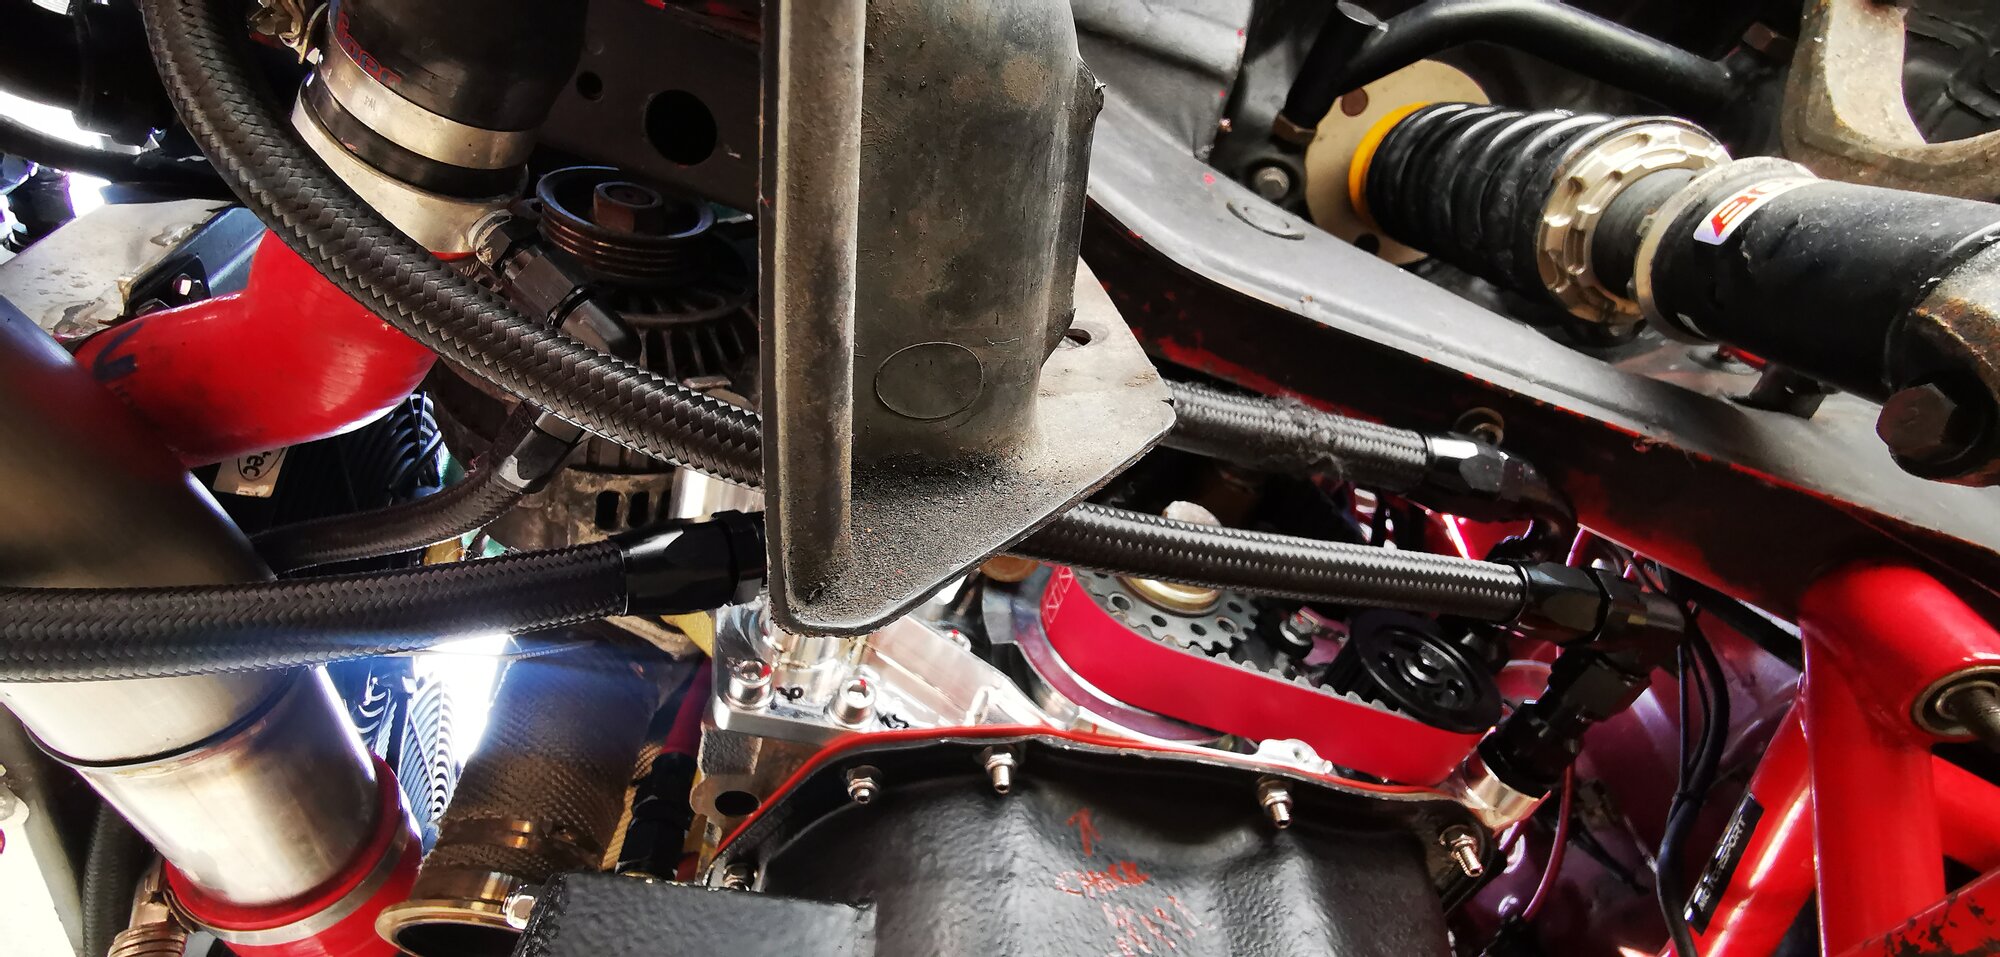
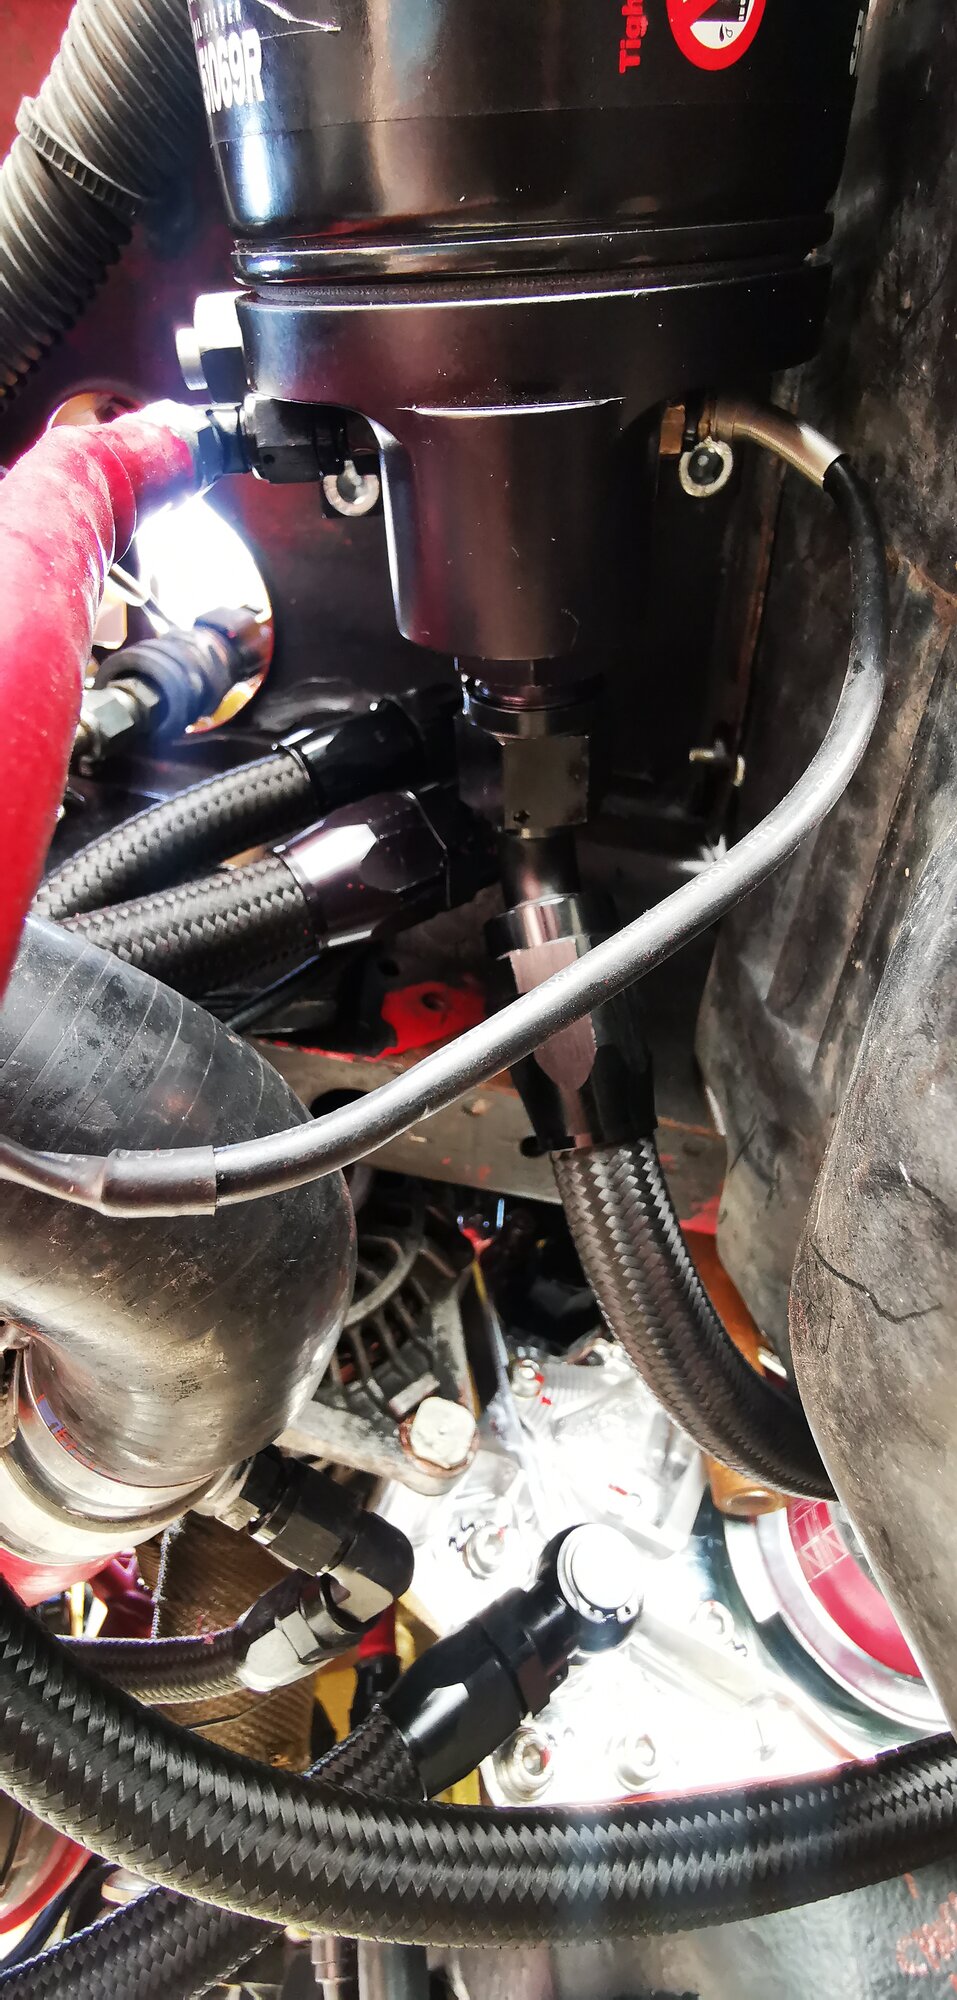
The main issue with the belt is the alternator belt on the lower part. This will foul the IN port, and for that reason, I had to use a banjo fitting to clear the belt. Getting an AN fitting on that would be impossible, unless you use another pulley near that location to deflect the belt up and over. I say up and over because you never want to place a fitting in the middle of the belt, because if you ever need to remove that belt, you will also have to undo the fitting, which means oil leaks (remember what I said earlier about engineering and thought process).
This is why you need to foresee these issues and plan how you will remove, add, and replace key components over time. Thinking ahead will make your life much easier and maintenance far less stressful (and far less messy of course).
Not everyone has an end result mindset and trust me, we all learn as we go and discover when something doesn’t work. Don’t feel like everything has to be perfect or planned down to a T, because none of us ever achieve that. What does matter is having a solid plan in place before starting the project, so you have a strong foundation to build from.
Along with that mindset and this blog post, it may just help you a lot more.
This picture (above) is the end result of the pre-checking stage and doing that meant I was able to figure out how to work around problems. So doing pre-checks, not rushing and mocking things up really helps but it is slower and sometimes means buying two or three times over to get it spot on.
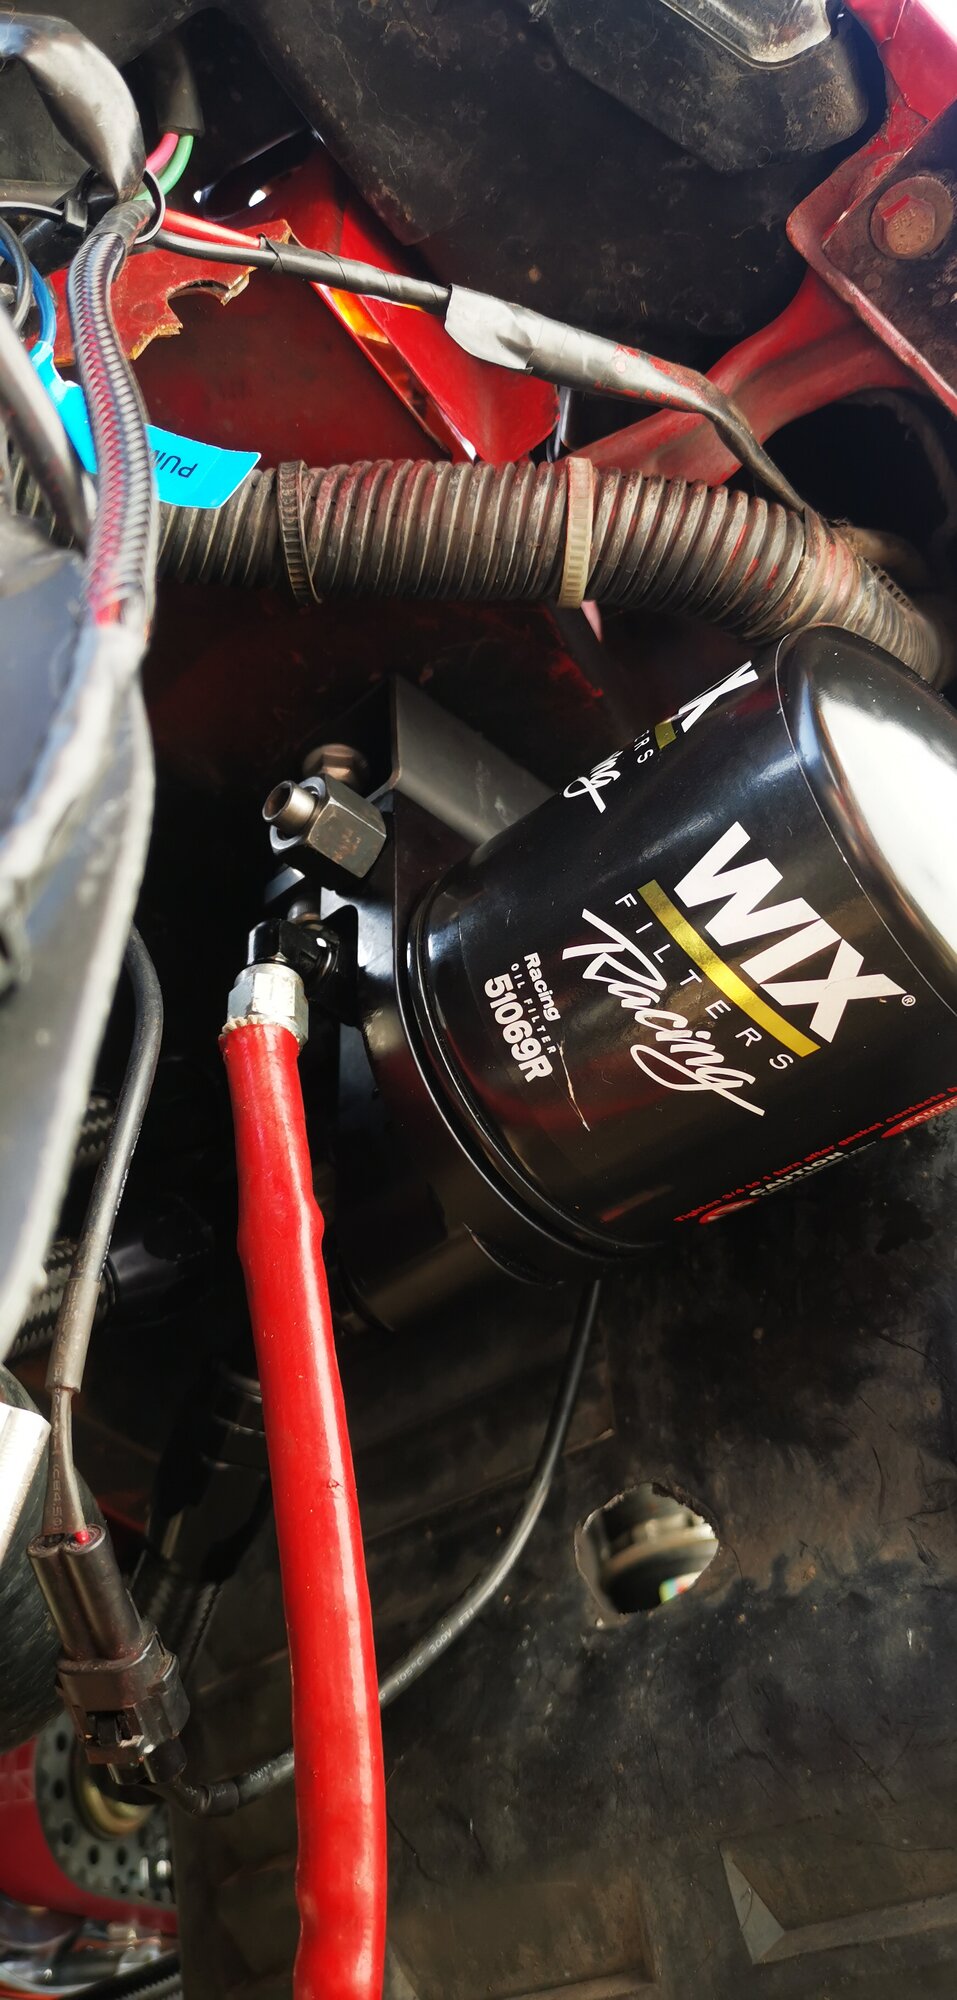
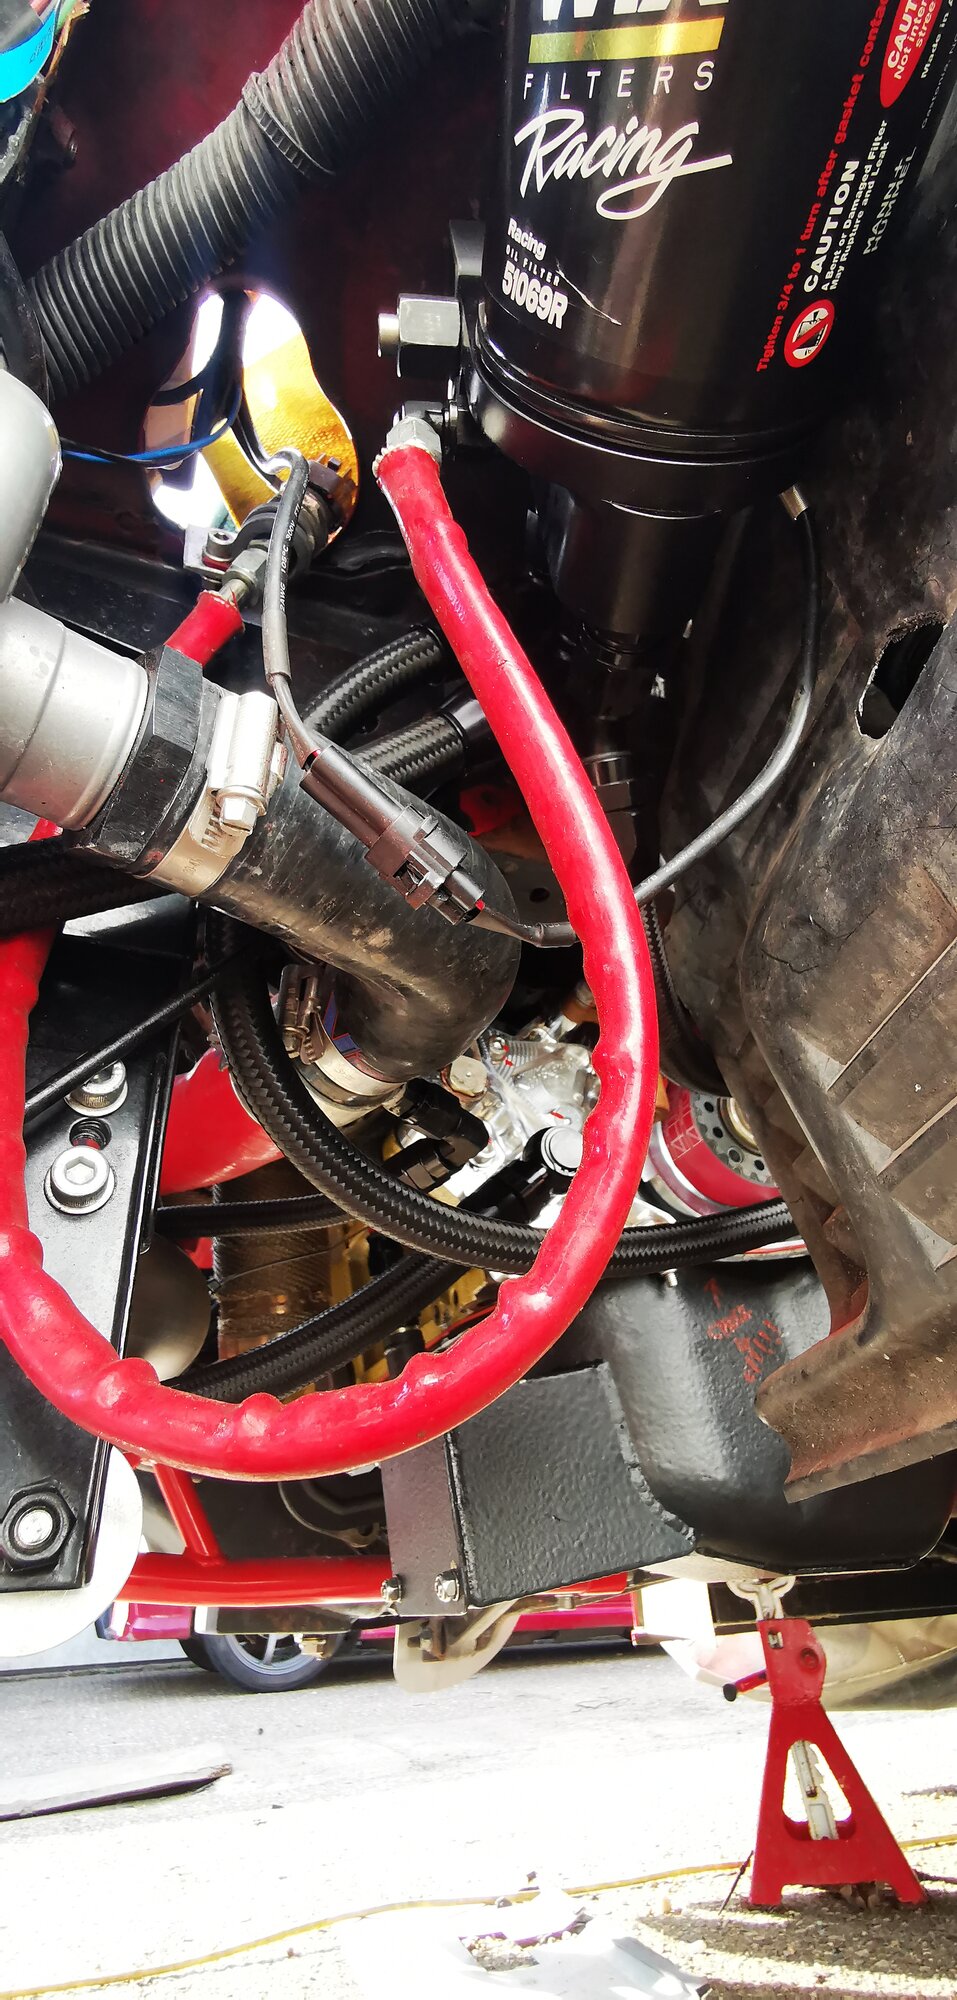
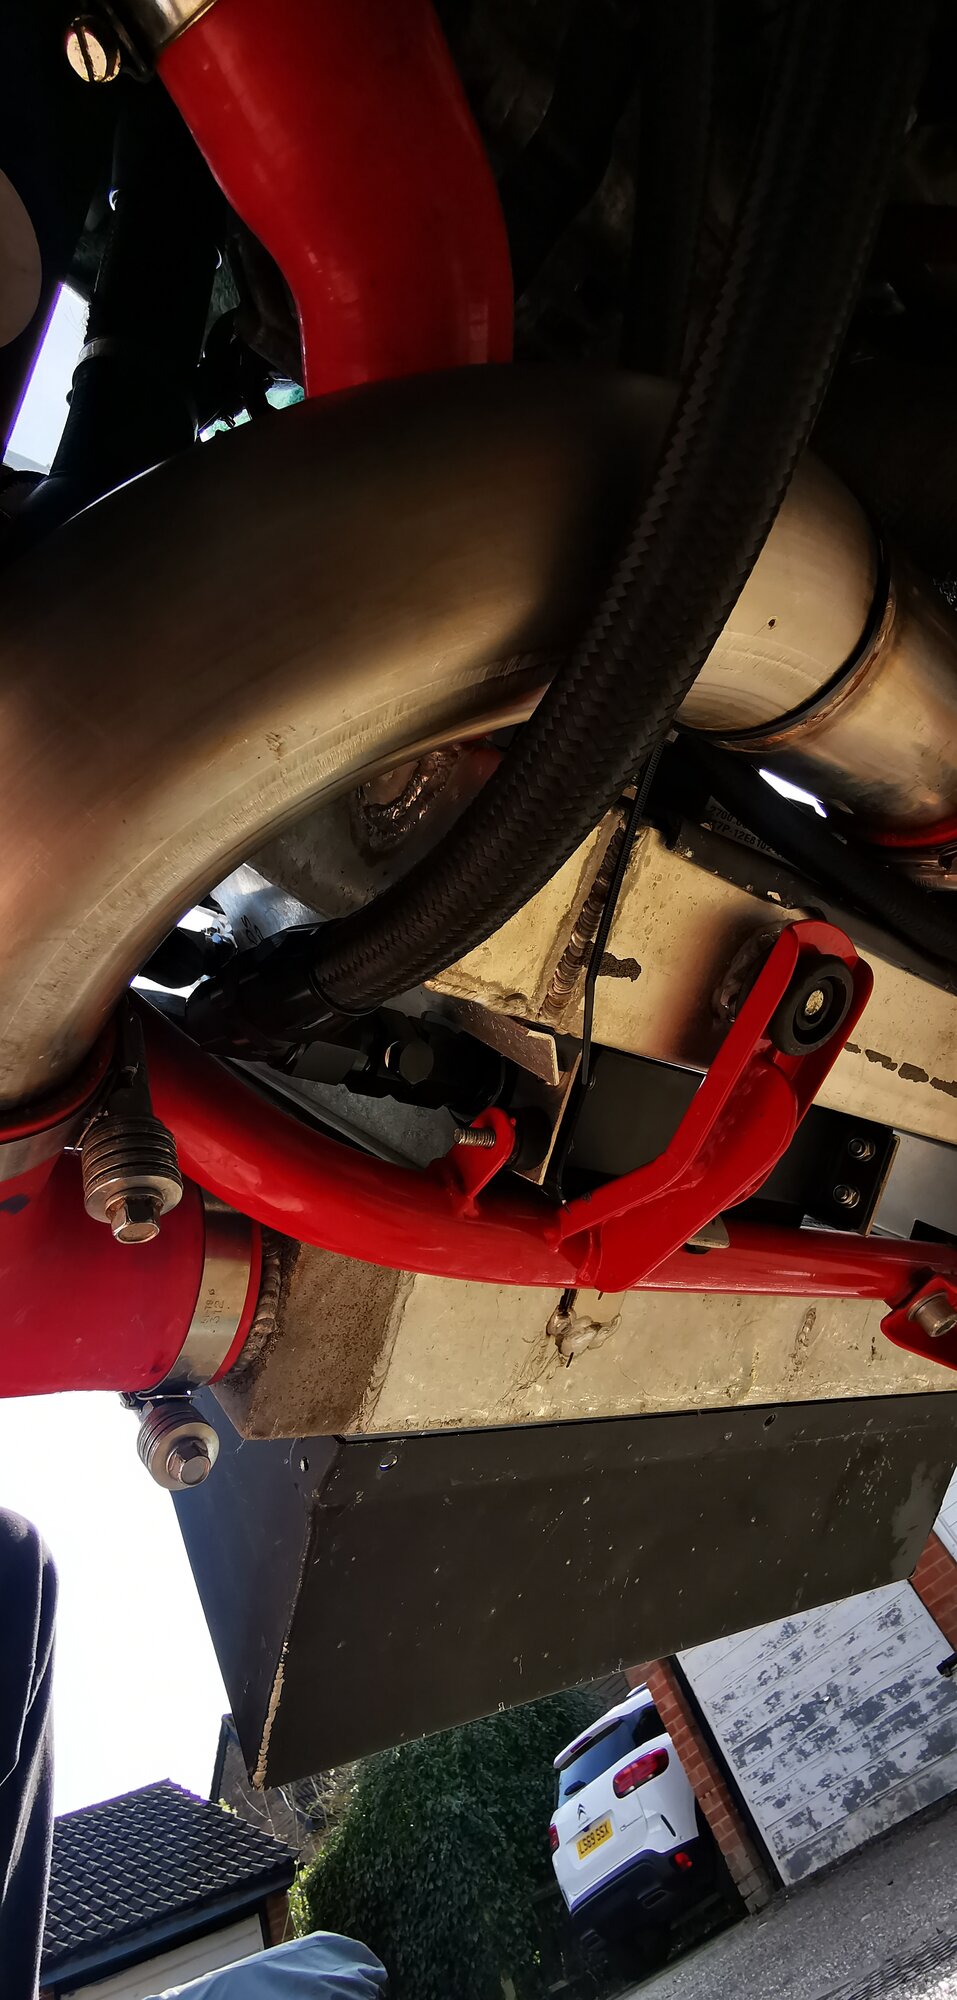
These pictures (below) show the new routing of the lines around things, keeping them safely away from pulleys and moving objects with clearance for panels and not entering the wheel well areas to prevent rubbing.
Had the EWP not been there, it would have made things a lot easier for sure. But, I would never go back to a normal pump on this engine as it far outweighs a stock system in every way.
In my YouTube video on the FIBA Motorsport channel, you will get to see where I placed my cuts to allow these fittings to be used and safely retain a good covering for the timing belt.
I should mention that I DO NOT use the front BS (balance shaft) port for venting pressure. Doing so would add more complexity and additional hose routing. It is possible, but it needs careful consideration on how to tackle this one.
Oil venting and extraction will be covered in a later blog post, where I’ll discuss oil catch cans, crank case pressures and how to help combat them.
Please follow this link (HERE) for the video of the pump with its timing cover on and showing how it fully protects, plus the other fittings and what you deal with in using this pump.
Thank you for reading and until next time!